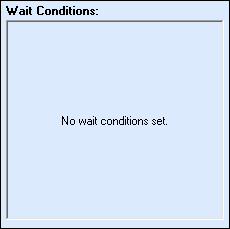
Wait Conditions Tab
![]() tab contains options for Laserfiche Routing activities. It enables you to specify wait conditions that must be satisfied before the entry will proceed to the workflow's next activity. If you do not assign wait conditions, the workflow will proceed to the next activity immediately after completing the tasks specified in the other tabs of this activity.
tab contains options for Laserfiche Routing activities. It enables you to specify wait conditions that must be satisfied before the entry will proceed to the workflow's next activity. If you do not assign wait conditions, the workflow will proceed to the next activity immediately after completing the tasks specified in the other tabs of this activity.

Note: You must assign a wait condition if you want to send additional e-mail notifications using the e-mail scheduling feature of this activity.
To open the Wait Conditions tab
- Add a Laserfiche Routing activity to your Workflow Definition by dragging it from the Toolbox Pane and dropping it in the Designer Pane.
- Select the activity in the Designer Pane.
- Under Routing Options in the Properties Pane, click the
 wait condition box to open the Wait Conditions tab of the Routing Activity Options dialog box.
To configure the Wait Conditions tab
- Click No condition set. Click here to create one.
- A condition editor will appear. Click any underlined text in the condition editor to choose from a variety of condition options. You can create as many conditions as you want by clicking Add condition. Right-click a condition for more options. Learn more about configuring conditions.
- Define for which entry these conditions must be met for the workflow to continue. From the top drop-down menu, select one of the following.

- Input entry: The wait conditions must be satisfied for the entry specified in the Entry property box. More information.
- Routed Entry: The wait conditions must be satisfied for the routed copy of, or shortcut to, the input entry as defined in the activity's Action tab. (If you chose to move the input entry, the routed entry is the same as the input entry.)
- Routing Folder: The wait conditions must be met for the folder the routed entry is inside.
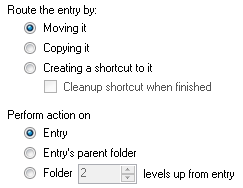
Example: Bob wants to route shortcuts of all incoming resumes to the applicants' folders. When an applicant's folder also contains an entry named Recommendations, he wants the workflow to continue. In this situation, Bob selects Route the entry by Creating a shortcut to it and Perform action on Entry in the Action tab. In the Wait Condition tab, he selects Routing Folder and specifies that the folder must contain an entry named Recommendations for the workflow to continue.